Showing posts with label little girl Pearl. Show all posts

Friday, September 25, 2009

The Traditionalist (and a tutorial!)

So, last week I was walking in the woods, and was thinking about flannel and tartan. And here is the result!


I love the traditional look of this jumper. It has a simple design that I enhanced with a little piping and some well placed buttons. I chose black watch plaid on the cream flannel so that it would pop. This dress has growth pleats to which I added tartan ribbon. Growth pleats are just horizontal pleats that are usually about an 1" to 1 1/2" inches in width. It will be in my etsy shop soon.

Anyway, I liked it so much that I decided to make it in red as well, using some European brushed twill that I've had for awhile. Not only that, but I thought it would be nice to share my technique of piping insertion in the yoke, so here goes.

A disclaimer: I am not a sewing expert, so if anyone can offer some more advice, it is much appreciated. These are simply my techniques for working with piping.

So, the first thing you want to do is to choose a simple jumper pattern with a separate yoke. I chose to make the design 'Louise' from Children's Corner. This jumper features buttons down the back, a full skirt, and growth pleats.

Decide which size you will be using. For the red dress I used a size 2. Roughly cut out your pattern piece for the front yoke and then cut a piece of the yoke fabric that is slightly wider than double the yoke width. You want to leave enough extra fabric to compensate for the seam allowances when you stitch down the piping.


The next step is to prepare your piping. I use the Darr ruler and cut off the excess piping allowance. My seams are 1/4", so if yours are wider, you would want to plan accordingly.


Put wondertape on one side. This allows you to place the piping exactly where you want it, without the hassle of using pins. It will wash away when you wash the garment.


Try to place the piping to the slight left or right of center. This doesn't matter all that much because you will select the center front line after the piping is inserted. Stitch straight down the piping directly over the thread used to make the piping itself.


When you have completed that, you simply fold the fabric over the seam allowance of the piping, right sides together. Make sure there is no gap between the piping seam allowance and the fabric itself. In order to keep the grain correct, you have to make sure it's pretty tight. Then stitch just barely to the left of your original stitch line, "squeezing" the piping, and making sure that none of the other threads are showing.


Open the fabric piece up again and press lightly.


Now for the second line of piping. You want the seam allowances to face the other direction. So if your piping seam allowance lay to the right previously, this time you want it to lay to the left, and vice versa. I want my piping to be about two inches apart, so I carefully measure all the way down as I put it into place. Stitch as before.


It will look like this as you stitch the second side.


Press again, making sure the seam allowances lay out from the center.


Now you want to fold your fabric piece so that the two lines of piping match up, so I put right sides together. You want to make sure that the two lines are directly over each other. If it's easier to pin them together, then do so. The fold of the fabric becomes the center front, and then lay your pattern piece as indicated on the fold line.


This pattern requires a lining, so I cut them out at the same time.


When you are done, your piece should look like this. Two lines of piping centered on the center of the yoke. Now just use this piece like you would have used a normal piece of fabric. Just be sure to keep the seam allowances flattened the way they were pressed.


I'm quite pleased with the cute, traditional look, and this is the finished project.


Happy sewing!

From New Hampshire,
~Melissa

Wednesday, September 16, 2009

The Woods

Today I just needed a break. I finished up an order this morning, and instead of sewing until pick-up time, I just had to get the dog out for a hike on a glorious late summer day.


I'm inspired by lots of different things. The covers of vintage children's patterns, other seamstresses, and the actual fabrics themselves. But nothing quite gets my juices flowing like a walk in the woods.

There must be something about repetitive motion that frees the brain for creativity. It happens to me when I am knitting too. Your hands or feet get so involved in the activity that your mind gets to rove. Today I was looking at the rocks on the ground and thinking about how a customer of mine was wondering about using the color gray. I don't happen to have anything in gray, but I started thinking about gray flannel and how an interesting combination might be to add a little tartan plaid.


But then I decided that rather than use gray which I don't have, I should use what I already have, which happens to be a cream flannel. I designed the entire thing in my head as I looked at the leaves just starting to turn.

So, my question to you is this: in what unexpected ways are you inspired? Tell me about them and maybe I'll try them out myself.

Now, where is that cream flannel?

Monday, September 14, 2009

Brain Implosion and Other Assorted Goings-On

Brain implosion?? Yes, yes, it's true. I have so much going on in my head these last few weeks that I thought this might actually happen to me. My daughter's first day of pre-K, a craft show, a camping trip, orders at little girl Pearl, extra training for the Delta merger, and more.

Can someone please, please sell me some extra hours of the day? Because the insomnia is great, but it's not quite cutting it. I will pay big bucks, I swear.

All right, let me back up a bit. There is a little something going on for "little girl Pearl", but I cannot jinx it, so suffice it to say that my house needed a major cleaning this week. And I mean MAJOR! If you follow my blog you know that I travel every week, I sew when my daughter is at school, and cook when dinner rolls around in the evening. This does not leave much time for the day-to-day upkeep, let alone the top to bottom sweep that houses require when you have a kid, a black dog, and two adults who have other priorities that don't require picking up a mop.


Luckily for us Augie is not a lab. But he still sheds, I assure you, and those little black hairs along with the dust do create a bit of a mess. So my wonderful "whirlwind cleaner" Mom came over last week to help me focus on the task without being overwhelmed by the monstrosity of our job. I'm seriously not joking. The clutter was everywhere, and it took us the entire day to just finish the upstairs bedrooms and get a start on the living area downstairs. But it gleams, so I thank you Mom because I wouldn't have even known where to start.

My husband finally finished the cubbies in our mudroom storage area so that we could get all the shoes and gear off the floor. This project has been 3 years in the making, and I am so, so relieved it's finished. A place for the mail, car keys, and the detritus of daily life finally have a designated space so they don't wind up on the island in the kitchen. You know what I'm talking about don't you?? The junk mail, bills, etc. always seem to wind up in the kitchen, and I am so hoping this doesn't happen anymore.

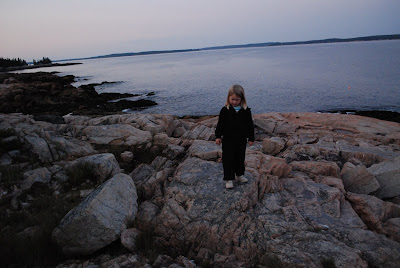
And we went camping. Yep, perfect timing. Actually weather-wise it was phenomenal. We went Down East Maine, past Acadia National Park through Machias, Lubec, and Cutler. We saw seals, porpoises, eagles, sea birds, beautiful scenery, and lots of Maine coast. What a great time, and we are looking forward to going again.


This was taken as the moon was rising over our campground spot, right on the headland in Milbridge.


Seal in Reversing Falls in Cobscook Bay


View from Boot Cove trail


A black dog on a black beach


View from Hamilton Cove


West Quoddy Lighthouse in Lubec, Maine
The Easternmost point in the U.S.


Lobster traps in Jonesport, Maine


A gear laden girl


All tuckered out

So yes, we had a great trip, but I had 300 emails waiting for me upon my return to the world of high speed. And all the camping gear added to our clutter-filled mudroom. But as everything was out it was a great chance for us to get organized, and now our house is clean. For at least 5 minutes.

Sorry to be so cryptic in this post, but just keep your fingers crossed for me, and as soon as I can I'll let you know what's happening.

From Detroit,
~Melissa

Saturday, August 29, 2009

Etsuko Furuya, will you design exclusively for me??


birds and berries outfit, originally uploaded by littlegirlPearl.

Only half joking there with my title. If I could afford to hire this woman, I would do it. And she doesn't even have to learn English because I speak some Japanese.

I'm in awe, I'm in love, I'm in lust with her designs. This is only the most recent fabric I've acquired of hers. There have been others that I wish I could get my hands on again. Most specifically this one.


It's the first fabric I encountered of hers and I was smitten from the start. There's just something about its funky vibe, retro feel, and color choices that I find irresistible. And judging by how many of these dresses I made, you all felt the same way.

The stripe that went along with that collection was amazing too. My daughter still uses the jumper as a top with a pair of jeans. The colors were so beautiful.

I loved the whole ladybug series, and all the colorways of the bird fabric. Unbelieveable.


Next to come was the vespa overalls which I think are great for boys.


My most recent obsession is this gorgeous double gauze fabric that has the most amazing hand.


I love the softness of the fabric coupled with those gorgeous colors. I've already tried three different patterns with this fabric, but am happiest with the little tunic design from Farbenmix, and the peasant dress with empire styling. Both have just the right amount of gathering, but not too much that you can't see the pattern. Perfection. And it fits the P.'s desire for as much blue clothing as possible. Oh, and she informed me that she likes purple too!


From Nashville,
~Melissa

Monday, July 13, 2009

Want to see?

I felt like a proud parent, putting it all together. Our crazy umbrella and yet to be painted dowel all properly clothed, just like I always knew it would look (wink, wink). Even if it took us three tries to get there. So without further ado...


And they're still not completely finished. Each dowel will get a hat and has to be painted too. I need 30 hours in every day! And here are my adventures in applique. I haven't done a lot of this, but it was FUN! Like decorating with scissors and thread. I'm pretty thrilled with how they turned out, so there will be more...


Coming to you from Denver, Colorado where it is way past my bedtime...

Thursday, July 9, 2009

I wasn't kidding...

when I said I had made a LOT of these skirts...


So, now the issue becomes how to display them at a show. I had some ideas right away as I was making them, and now it's time to show you just how ridiculously yankee we get around here. By yankee I mean cheap of course...

My husband is an engineer, and he had the best idea almost immediately, but no, no, I couldn't just go with it. I had to "devise some kind of system" to put these on display. My first thought was wire hangars. If I could bend them into some kind of spoke system, and somehow twist them together and nail them into a dowel, and, and, and...you guessed it. Total disaster.


My next thought was to use wire. It'd be easier, right?? So the thought process here was to get some metal rings which would slide over a dowel, and make a spoke system that would then attach to a ring below. Here is how far I got on this idea before total abandonment...


The problem was that the wire kept sliding around the ring, making it impossible to support the skirt in any kind of meaningful way. And I can just see myself futzing with the display every time someone wanted to look at the skirt. Unacceptable.


We then thought that something rigid might work. We have some foam laying around, and thought that by pushing the wire up through the foam and down the other side, we could create, you guessed it, a spoke system for support. This may have worked other than that the foam kept sliding down the dowel, and the spokes weren't perfectly symmetric. Which leads me back to my engineer husband who suggested a modified umbrella.


Oh, I wish I had just started with this idea in the first place...I couldn't find any children's umbrellas at my local drug store (our town's version of a five and dime), but I did come up with these trusty large ones. I took off the fabric, saved the plastic doo-gigs on the end so that no one gets hurt, cut off about 6 inches of frame, and voila...


Eventually, there will be two holes in the base; one to hold the umbrella handle, and one right next to it to hold a larger dowel with a cross-piece for a top. I anticipate adventures in applique later today. The larger dowel will fit through the spokes of the umbrella so that when the top comes down, it'll cover up the top piece.

Oh sure, I could have purchased some dress forms that would accomplish the same thing a whole lot quicker, but they're expensive, heavy, and that's just not the "yankee" way.

Note to self: listen to your engineer husband more often.